Landscape Design
Living in the front-range of Colorado brings its own series of challenges when it comes to plants. After purchasing my home, I realized I didn’t want to be part of the “Green Lawn” club, understanding the strain on water resources and lack of ecological diversity a plain lawn brings. Thus began my amateur journey with landscape design. This is that story.

Stage 1: Planning & Mapping
When we first purchased the home, the yard was relatively green but required a minimum of two waterings a week. We had already allocated a large chunk of our water bill to the 16’x8’ raised bed for vegetables, and were not eager to continue feeding the monoculture by the curb.
I measured out the area with tape measure and through the interactive satellite images provided by our county. I tracked the sun exposure of the area throughout the first year, pinpointing where hot spots occurred. I watched the rain move through the lawn to understand how the topology determined the flow of water.

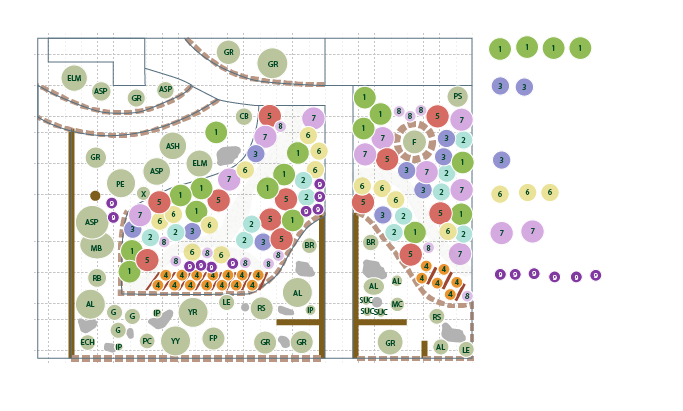
Map Existing Structures & Plants
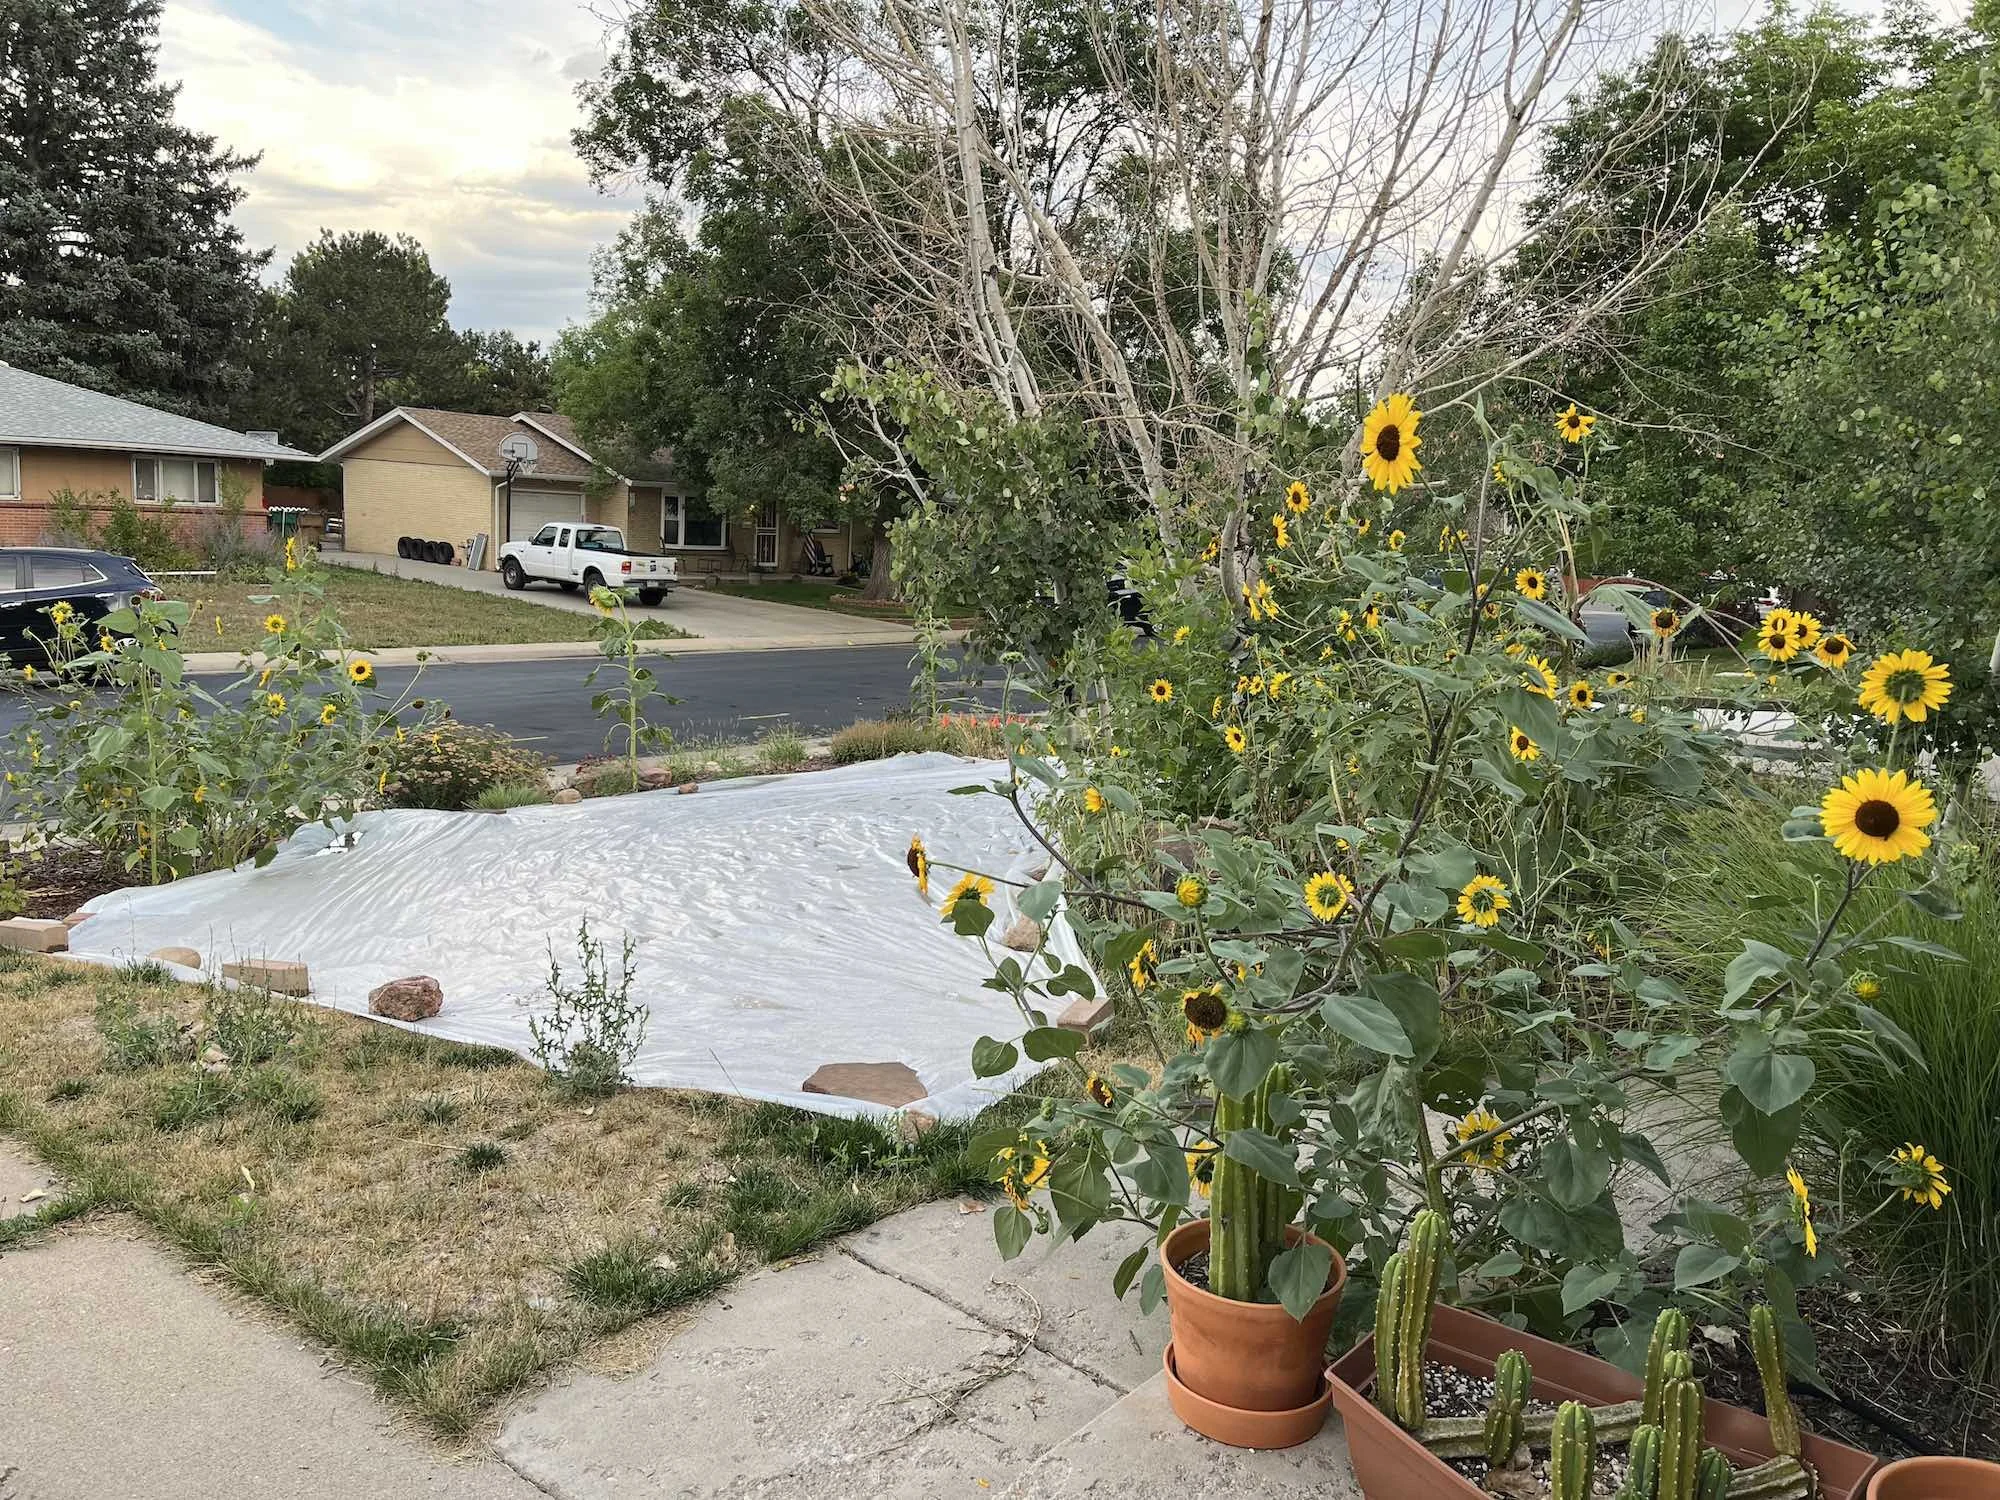
There was a fair amount of hardscaping already part of the yard that needed to be accounted for. We also have planted a number of drought-tolerant plants along the non-grassy areas alongside existing plants.
This exercise also helped to discern which plants would need to be removed to increase the available growing space and light exposure.
Stage 2:
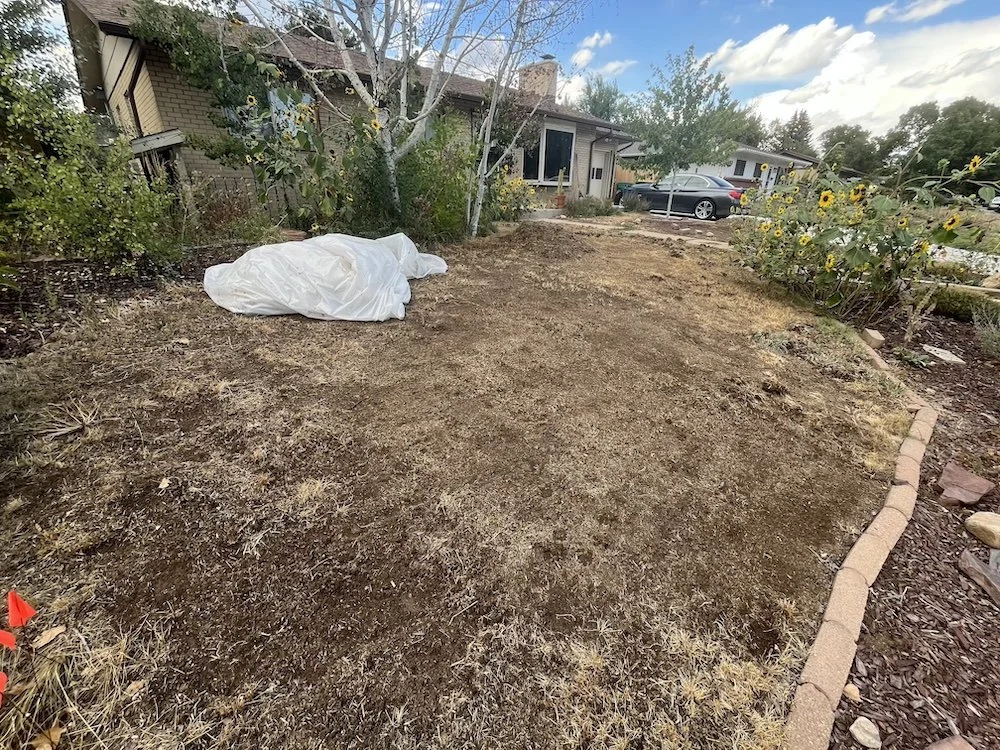
Solarization & Lawn Removal
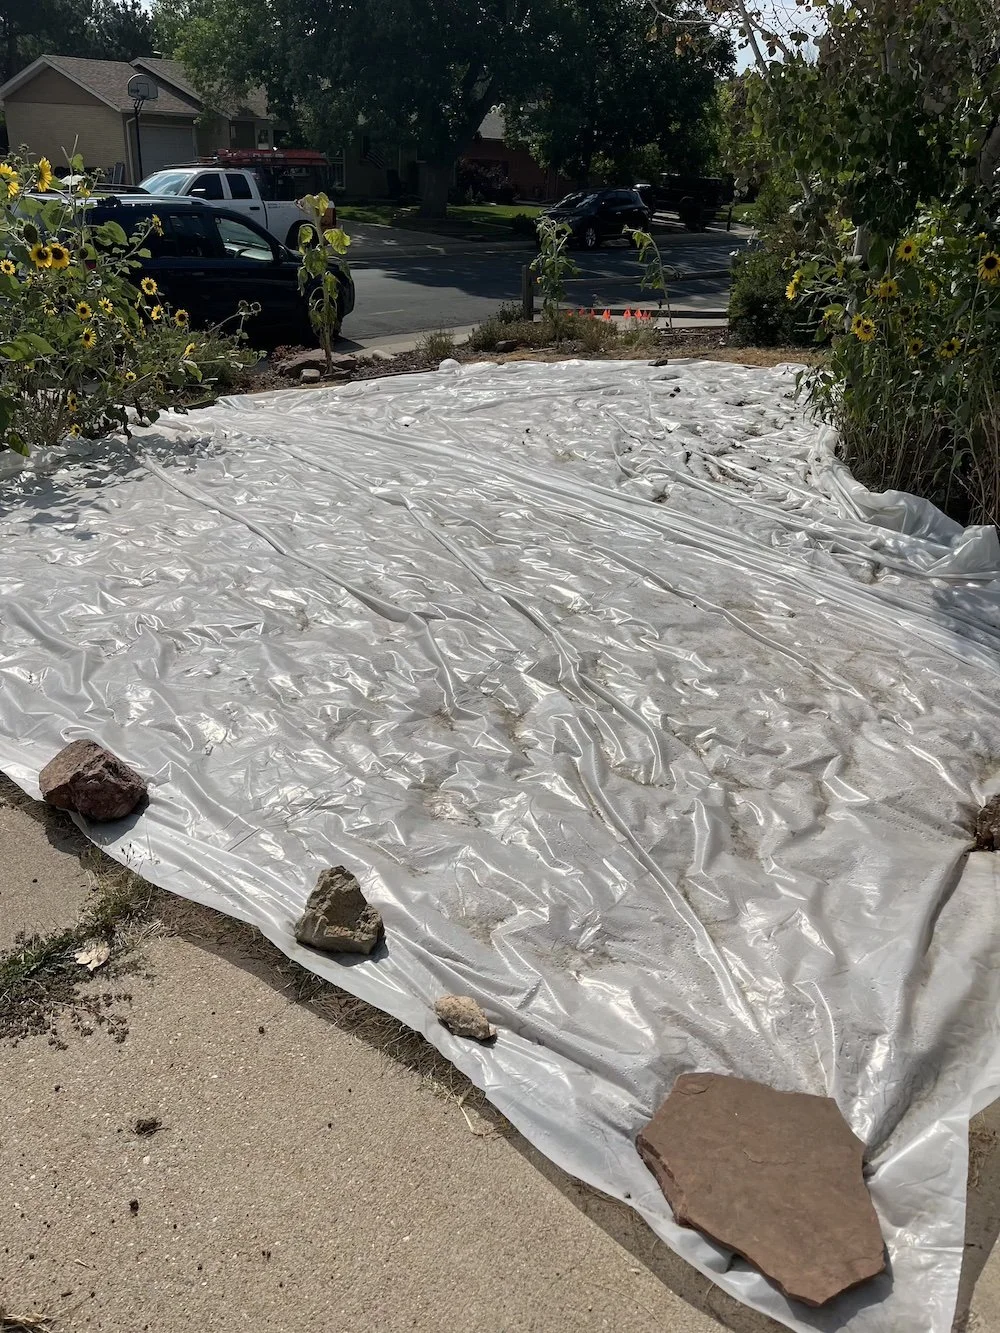
There are a couple of ways you can remove/kill grass in your yard. The more laborious options include physical removal with a shovel or sod cutter. But you run the risk of stripping nutrients from the soil with that option.
We decided to retain those nutrients by solarizing with massive clear/white tarps to promote intense heat underneath. This heat would help to sterilize weed seeds and encourage the composting of existing plant material. Those tarps stayed in place for 3 months in total.
Stage 3:
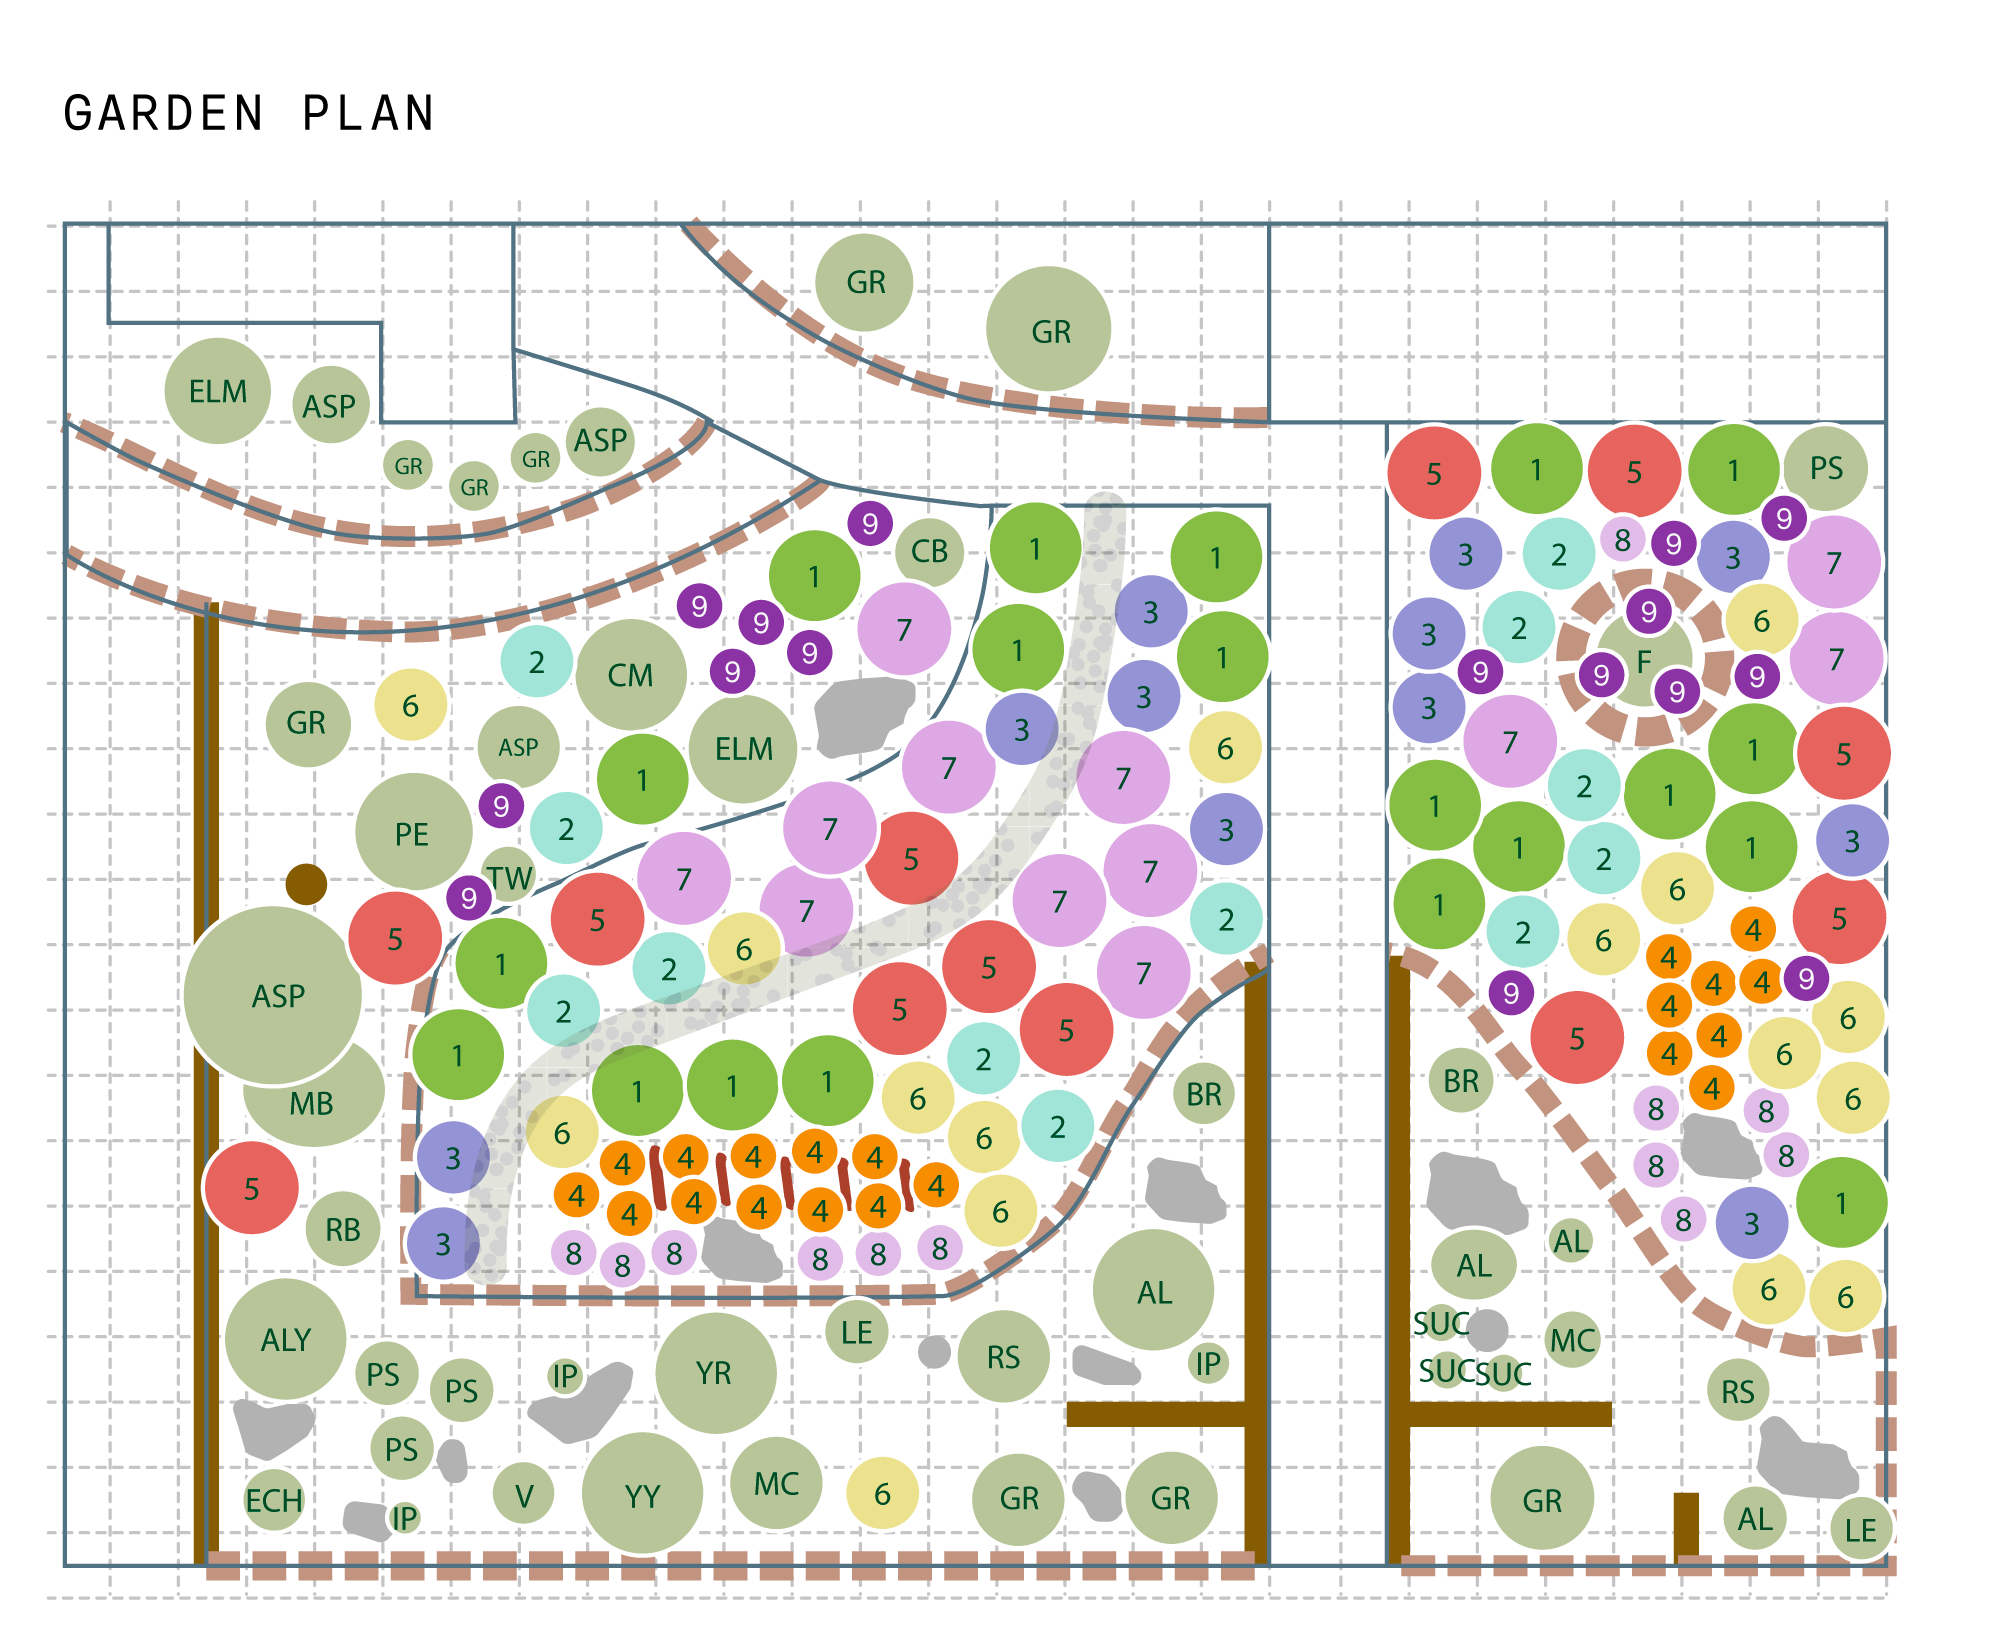
Finalizing Plan
Understanding that we would be receiving over 100 plants from the Denver Resource Center, we needed to plan for the mature spread and height of each plant. Leveraging an easy drag and drop layout in Adobe Illustrator, I was able to play with placements through a couple of iterations. Ultimately, I created a garden plan that would be our blueprint for planting day.